ADB FRP Remove Tool Android 11–15 by GSMYOGESH Free 100% Working
Getting locked out of your smartphone after a factory reset can be frustrating. Whether you’ve forgotten your Google Account credentials or purchased a second-hand phone still linked to the previous owner’s account, Factory Reset Protection (FRP) can block your access.
The ADB FRP Remove Tool (Android 11–15) by GSMYOGESH is a verified and trusted solution for safely bypassing FRP locks. With easy-to-use functions, this lightweight tool enables Android users and technicians to regain access without complex flashing or risky firmware methods.

What is FRP (Factory Reset Protection)?
FRP (Factory Reset Protection) is Google’s anti-theft feature that requires the original Google account credentials after a factory reset. It prevents unauthorized use of a device after reset, but it can trap legitimate owners if account credentials are lost or the previous owner didn’t remove their account.
ADB FRP Remove Tool Android 11–15 by GSMYOGESH Download
- File name: ADB_FRP_TOOL_GSMYOGESH.zip
- Size: 1.33 MB
- Password: gsmxblog
- Download link: Proton Drive
Pre-Requisites
Before running the FRP removal tool, prepare the following:
- 🖥️ A Windows PC (Windows 7/8/10/11 supported)
- 📱 The locked Android phone (Android 11–15)
- 🔌 A reliable USB data cable
- 📁 The ADB_FRP_TOOL_GSMYOGESH.zip folder with all files intact
- ⚙️ USB Debugging enabled (bypass setup wizard via YouTube tutorials)
How to Use ADB FRP Remove Tool
Step 1 — Launch the Tool and Connect Your Device
- Open the ADB FRP Remove Tool on your PC.
- Connect your Android phone via USB cable.
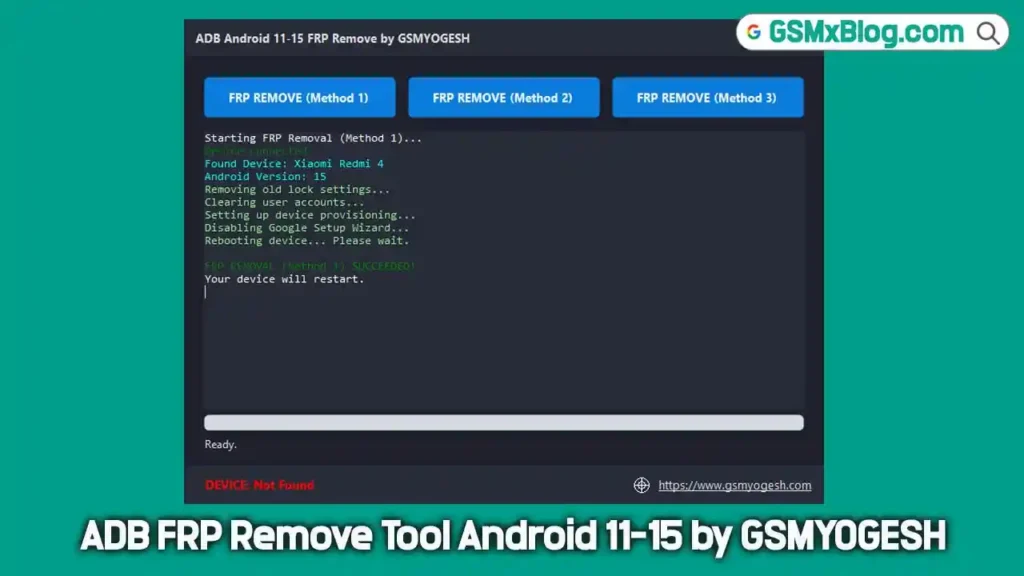
- The tool may initially display “DEVICE: Not Found” — don’t worry, that’s normal.
Step 2 — Authorize USB Debugging
When prompted on your phone:
- Tap Allow USB Debugging
- Tick ✅ Always allow from this computer
- Once authorized, the tool’s status will turn green:
“DEVICE: <device-name>”
If it says Unauthorized, replug and allow access again.
Step 3 — Select a Removal Method
The tool provides three FRP removal modes — start from Method 1.
🔹 Method 1 — Quick FRP Removal
- Click FRP REMOVE (Method 1)
- Wait for logs like “Clearing accounts…”
- Once complete, your phone will reboot.
- Success message: ✅ FRP REMOVAL SUCCEEDED!
🔹 Method 2 — Add Account via Settings
- Click FRP REMOVE (Method 2)
- The tool opens Settings → Add Account
- Add a new Google account manually, and the phone unlocks.
🔹 Method 3 — Deep File Removal
- Click FRP REMOVE (Method 3)
- Deletes residual FRP lock files
- Wait for completion and reboot — you’ll see the success message again.
Troubleshooting — Common fixes
- “Device not detected!”
- Use a different USB cable (data-capable).
- Try another USB port (prefer back-panel ports on desktops).
- Install official USB drivers for your phone.
- “adb.exe not found”
- Ensure all tool files remain in the same folder. Don’t move or delete files.
- Nothing happens
- You likely did not tap Allow USB debugging on the phone. Re-do Step 2 carefully.
- Tool shows DEVICE: Unauthorized
- Unplug the phone, reconnect, and re-allow the debugging prompt.
- If methods fail on one model, try the other methods in order and reboot between attempts.
Conclusion
If you own the device and followed the steps above but still can’t remove FRP, consider contacting a reputable local repair service or the device manufacturer with proof of ownership. Want more guides like this? Subscribe to GSMXBlog and check our tutorials for video walkthroughs that show how to bypass the setup wizard, enable USB debugging, and safely use FRP removal tools. Leave a comment below with your phone model and Android version if you need model-specific tips — we’ll help where we can.


